Monday, 31 August 2015

Homemade Blackberry Jam

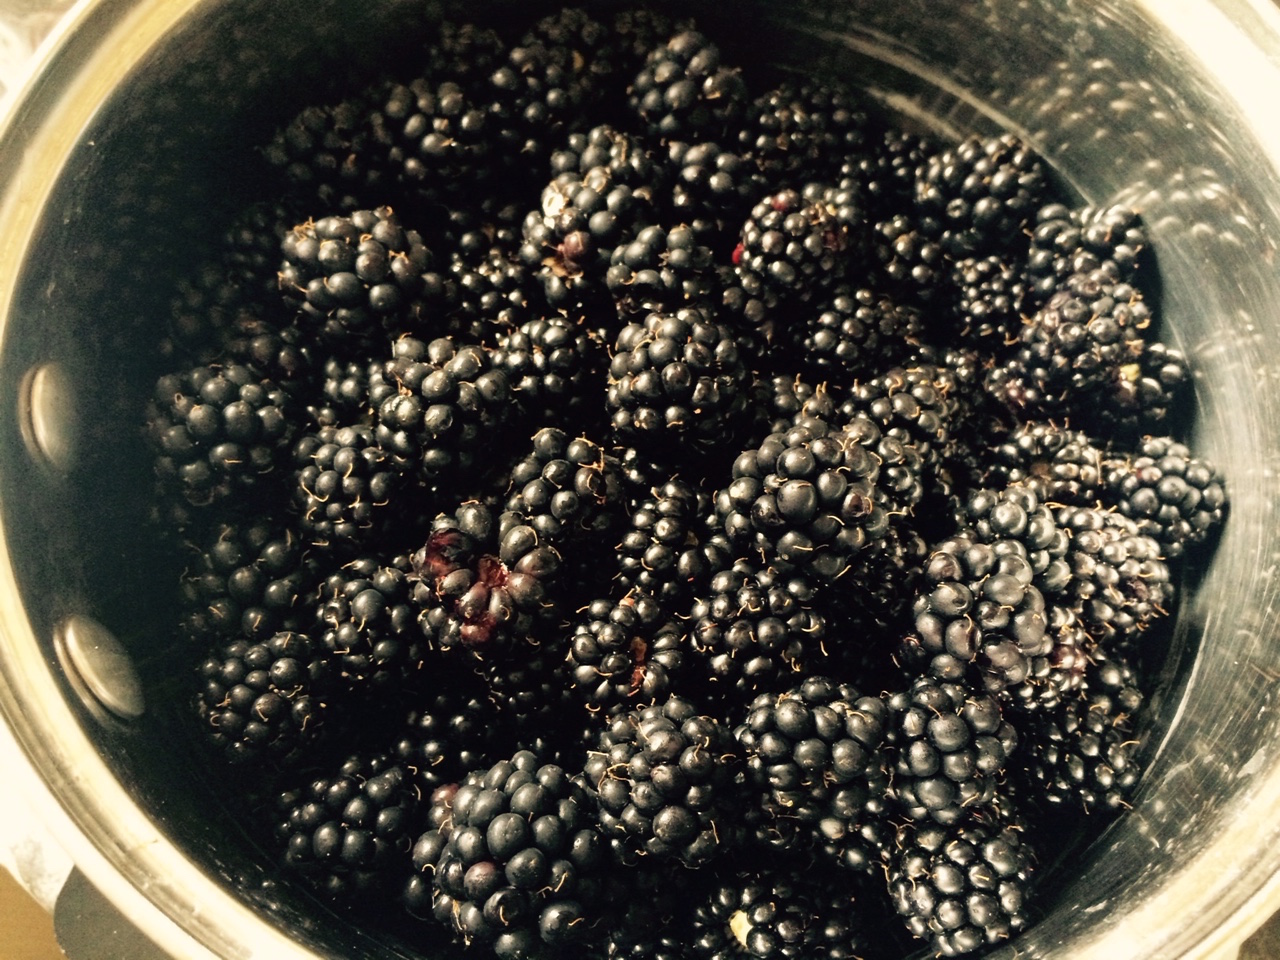
And so the foraging walks continue.... This time we have been busy gathering blackberry. They are so abundant near where we live and I cannot understand why not more people are picking and making use of these beauty. They are FREE for all!! 150g of blackberry will easily costs £1.50 from the supermarkets. I suppose from my point of view there are more for me! 

I perception on jam making has always been 'a bit of a faff'. Reason being I saw all these variety of jam making kit available in Lakeland and I thought: 'Gosh, this is so much effort, and all the gear that is required!' Well, how wrong was I. Again, there many different types of ham and preserves recipes available, and I found one that requires minimal effort... excellent! It is so simple to make that I am addicted to gather more berries and produce more jam, which makes perfect Christmas gifts for friends and family. 

Aren't they gorgeous? They are very sweet and juicy as well.


600g blackberries
350g soft brown sugar

1. Put the blackberries into a large sieve and rinse under running water.

2. Tip blackberries into a large pan, cover it and cook on a low heat for 15 minutes.

3. Take it off the heat and use a potato masher to press the berries.


4. Warm the sugar in the oven in the lowest heating.

5. Heat the berry puree to boiling point, remove from the heat and add the warm sugar. Stir over low heat until sugar is completely dissolved.

6. Bring the mixture to the boil and boil rapidly until it begins to thicken. I find this takes approximately 40 minute depending on personal preference.

7. Meanwhile, prepare the jam pots. On how to sterilise jam pots please lick here.

8. While the jam is hot, fill the pots to the brim and cover with the crew cap/ lid.

9. Label the pots if desire. Store in a cool and dark cupboard.

Wednesday, 26 August 2015

Homemade Elderberry Cordial

We are now into late summer, the wild berries are in full bloom, especially after a bit of rain and sunshine. The countryside is beaming with blackberries, crab apples, elderberries etc 

My friend and I went on a foraging walk and gathered some elderberries that looks exquisitely like semi precious germ stone. We were too busy picking that I forgot to take a picture of these beauty. For those who are unsure what elderberry looks like, here is a picture I found on Google Images:


There are so many different elderberry cordial recipes widely available and it really is so simple and fun to make. Do be careful and not wear any nice or light colour clothing as the berries do stained.

I didn't really measure how much cordial I have produced, but you get the idea:


It is very important to sterilise the bottles or jam pots properly, otherwise the content will be spoiled within days. I always keep all the interesting glass bottles or jam pots for the pantry or for making homemade goodies as such. Sterilising is simple to do and here is how:

1. Wash the bottles/ jam pots and caps under hot soapy water. Drip dry them on draining board.

2. Preheat the oven at the lowest heat.

3. Place the bottles/ jam pots and the caps on a baking tray and place into the oven until all liquid evaporated. They can be left in the oven until you are ready to bottle/ pot the content.


750g granulated sugar
700g elderberries 
800ml water

1. Get the elderberries off into a large sieve by using a fork. Rinse under running water to get rid of any bugs etc.

2. Boil 800ml water in the kettle and pour into a large mixing bowl. Preferably not stainless steal, as I find this will give the liquid a metallic taste.

3. Mix in the sugar and stir to dissolve. 

4. Add the elderberries and stir occasionally. Leave for at least 24 hours. 


5. To enhance the flavour and colour, press the berries against the bowl using a spatula to release the juices. 

6. Sieve through a muslin cloth. Alternatively I find a pair of brand new stockings does the trick just as well. 


7. Pour into cleaned and sterilised glass bottles. Seal with caps straightaway.

Tuesday, 25 August 2015

BBQ Organic Lamb Burger with apricot, onion & chilli

Saturday was absolutely scorching. The South East was at around 28C and at times I literally didn't know what to do with myself, apart from keeping hydrate with a glass of cold sparkling water with a splash of grenadine cordial. 

Knowing the rest of the coming week will be raining everyday and Saturday could be the last day of summer, I was determine to make the most of it. There is not a better way to spend a sunny Saturday than lounging around in the sun and have a long BBQ. A few bits was on offer: beef kebabs, sausages, salad, baked whole sea bass and homemade lamb burger. 

Burgers are so easy to make, any I often find them more tasty than pre-made ones, as one has the ultimately control of seasoning. Rather than going for beef, I went for lamb burger with apricots, chopped onion and chilli. As a treat. I went for Waitrose Duchy Organic lamb mince instead. I must say the meat has made a difference. The burger stayed moist and juicy.

Look how colourful they are with the yellow, red and purple!


Makes 4

400g Waitrose Duchy Organic lamb mince
1 egg
1 red onion finely chopped
1 red chilli, finely chopped
5 apricots, chopped
Season with salt & pepper

1. Prepare the onion, chilli and apricots then mix them with the mince.

2. Season the mixture with freshly ground peppercorn & sea salt.

3. Crack in an egg and mix them up.

4. Place a bowl onto an electric scale and weight the mixture. Mine was a total of 600g.

5. Have some greaseproof paper at the ready.

6. Divide the mince in to 4 proportion and place each proportion into a burgher shaper then press hard.

7. Place the perfectly shaped burger onto a piece of greaseproof paper and repeat step 6.

Now you have 4 perfectly shaped lamb burger ready to be barbecued! 

Monday, 24 August 2015

Chicken Katsu (チキンカツ)

Most meat eater like a bit of fried chicken now and then. It is such a guilty pleasure and nobody would really admit they like those juicy, crispy chicken legs from Kentucky Fried Chicken. I can put my hands up and admit I do enjoy the rare occasion of fried chicken legs, and will be riddled with guilt afterwards, annoyed with myself for not having the willpower to put chicken's welfare first. Also my arteries. 

I kept the oil used to fry those scotch eggs in a pan for a while, partly because it is a chore to discard it properly and partly because I would quite like to fry some guilt-free free range chicken thighs. 

What I have in mind is to make a chicken katsu, which is a Japanese deep fried chicken dish. What makes it Japanese is the sauce that usually goes with a katsu - Tonkatsu sauce. The best combination I find is lots of tonkatsu sauce & Japanese mayo all over the meat. Let's worry about my arteries another day...

A light batter is the characteristic of a good katsu. I marinated the chicken thighs with some fresh ginger, sake and Japanese soy sauce for a couple of hours first before coating them with batter mix.


Serves 2

1 litre of vegetable oil
4 boneless & skinless free range chicken thighs
1 large free range egg, whisked 
1/2 loaf of stale white bread
250g plain flour, seasoned with salt and pepper
1 thumb of fresh ginger, thinly sliced
1 tbsp sake
1tbs Japanese soy sauce

1. Marinade the chicken thighs with ginger, sake and soy sauce for at least a couple of hours.

2. Cut the stale loaf of bread into small cubes. Placed into a food chopper and blitz until the cubes turn into fine crumbs. Place into a bowl.

3. In a bowl, season the plain flour with freshly grounded black pepper and sea salt.

4. Whisk an egg in a bowl. Now, arrange the bowls in this order: flour, whisked egg & breadcrumbs.

5. Heat the oil in a deep pan until when dropping a small bit of breadcrumbs it sizzles. 

6. Coat a chicken thigh with flour, dip it into the egg and then coat it well with breadcrumbs.

7. Deep fry in the oil until golden brown. Depending on the size of the thighs, this should take around 10 minutes. If unsure, stick a knife through the chicken and chicken. 

8. Repeat the above steps for the remaining thighs.

9. Lined a plate with a good layer of kitchen paper. Use a slotted spoon to scope up the thighs and place on the plate for the excess oil to be soaked up.

10. Service the katsu with rice, and garnish with some Bulldog sauce & Japanese mayo.

Sunday, 23 August 2015

Mary Berry's Shrewsbury Biscuits & Cornish Fairings

Whenever I need to bake, I always go for Mary Berry's recipes as they always work like a treat. I particularly like the traybake recipes as they are quick and simple enough. The variety of victoria sandwich sponge recipes are also excellent. 

If you like classic bake goods, I personally I would highly recommend Mary Berry's Baking Bible over any other baking cookbook available on the market. I have tested a wide range of recipes from this book and have never had a bad experience. Some online retailers are selling this book at a very reasonable price.


I have recently used a couple of biscuits recipe from the book: 

Shrewberry Biscuits - They are not dissimilar to fruit shortcake. I was a little heavy handed with the sprinkle of sugar.

Cornish Fairings - They are like ginger biscuits, very autumn & Christmasy! What I like about this recipe is the technique of rolling a small dough, bake the biscuits half done and press them down using another baking tin to create this crinkly cracks. I thought these cracks help to create a more professional look to them. 

I bagged these biscuits up and took them to friend's for tea, and excellent goody bag!


Sunday, 9 August 2015

Pork Shoulder Roast with Crackling

A colleague of mine recommended a quality butcher to me which sets within a garden centre, what an unusual choice of premises. I was ambivalent about its selection and quality. Much to my surprise, the butcher counter has a huge selection of cuts of meat along with other food products. It even has a carcass hanging in the back of the shop front which you can easily specific your choice of cut.  

This Bevan's Butchers has a butcher counter within the Longacrse Garden Centre in Bagshot really is worth a visit. It offers more than meat, but also pies, cooked meat, cured meat, cheese, fish and more. Moreover, the staffs are so polite and knowledgable, the service is absolutely superb. Obviously the reason for my visit is for the quality meat, and the price is higher than average so this is a treat.

I bought a small piece of pork shoulder joint for a 2-person roast dinner.


Serves 2

500g pork shoulder joint
2 carrots, peeled and quartered
1 bunch of fine beans
2 potatoes, peeled and quartered

For your perfect roast potatoes, please click here.
  1. Preheat the oven to 220°C.
  2. Season the joint with a good amount of freshly milled sea salt & peppercorn.
  3. Place the joint into a roast tin skin side up and ensure the skin is dry. Scored the skin with a sharp knife.
  4. Rub more sea salt over the skin and into the creases. 
  5. Place the meat into the oven and cook for 30 minutes before turning the heat down to 180°C.
  6. In a separate roast tin, put the quartered potatoes and carrots int and drizzle some rapeseed oil all over. 
  7. Season with freshly milled sea salt & peppercorn and place into the oven. Cook for further 60 minutes together with the meat.
  8. Take the meat out and run a knife through the middle. If the juice is clear then set it aside to rest whilst steaming the fine beans; if the juice is bloody, return the joint into the oven for a further 10 minutes or until cooked through.
  9. Bring a pan of water to the boil and steam the fine beans. 
  10. Carve up the joint and serve up.

Thursday, 6 August 2015

British picnic: Scotch Quail's Eggs, Sausage Rolls, Cheese Straws & Sticky Chicken Wings

According to the weather forecast we are expecting a hot and sunny weekend, with every chance for it to be the total opposite, of course! We Brits are prepared for all weather, such as having a blanket at the ready in August! 

As soon as the sky is a little brighter, you will see people having the limbs out to maximise the tanning session; BBQs are in full swings in the back gardens, or chilling in the park with a picnic. It all depends on the party size and personal preference, a typical picnic hamper usually consist of quiche, cocktail sausages, scotch eggs, meat pie, strawberries and cream, pate etc 

Some of these food items can be easily made at home to add a little luxury to this hamper. Here are a few recipes:


Cheese straws

Jus-Rol Ready to Use Puff Pastry
200g grated extra mature cheddar cheese (depending on how cheesy you like your straws)

1. Preheat the oven to 200°C.

2, Grate some cheese.

3. Lightly flour a clean kitchen surface and unroll the pastry.

4. Slice the puff pastry into strips and place them on a baking tin that is lined with a sheet of greaseproof paper.

5. Sprinkle the cheese over the pastry strips and place it in to the oven.

6. Bake until they are golden but not burned. 


Sausage rolls

400g good quality free range sausage meat
Jus-Rol Ready to Use Crust Pastry
1 read onion, finely chopped
1 tbsp of wholegrain mustard
1 free range egg, whisk

1. Preheat the oven to 200°C.

2. Cook the chopped onion in a frying pan with some butter until soft. Leave it to cool down.

3. In a  bowl, mix together the onion and the sausage meat.

4. Lightly flour a clean kitchen service and unroll the pastry.

5. Spread the wholegrain mustard evenly over the pastry.

6. Cut the pastry through the middle and pastry enough sausage meat in the middle of it. 

7. Fold the pastry together so one is on tope of the other. Repeat the same to the other half.

8. Cut the sausage rolls into bite size and place onto a baking tray lined with a sheet of greaseproof paper.

9. Brush over the whisked egg.

10. Place the tray in the oven and cook for 20 minute or until  golden but no burned.


Scotch quail's eggs

12 quail's egg
100g stale skinless white loaf
250g good quality free range sausage meat
1 free range hen's egg
3 tbsp plain flour
1 litre Sunflower oil

1. Fill a large pan with boiling water and cook for 1 minute then take them of the heat and cope them out of the water to cool.

2. Cut the stale bread into small chunks and together with a pinch of sea salt and freshly ground black pepper, blitz in a mini chopper until it turns into fine dust. Place into a bowl.

3. Whisk the hen's egg in a bowl.

4. Divide the sausage meat into 12 patties of equal size.

5. Lay out 3 bowl with the following ingredients in: flour, egg and breadcrumb.

6. Peeled the quail's eggs.

7. In a cling film, place the sausage meat on top and put an quail's egg on top. Use the cling film to roll the sausage meat around the egg.

8. Now roll the egg first into flour, then dip into the beaten egg and followed by rolling it in the breadcrumb. Repeat the steps for the remaining quail's eggs. 

9. Pour the oil into a deep saucepan and heat it until it reaches about 180°C.


10. Lower the scotch quail's eggs in using a slotted spoon and fry until golden brown. Don't put too many in at once to avoid overcrowding. 

11. It should take around 5 minutes for the sausage meat to cook through. If the egg is browning too quickly then lower the heat a little. 

12. Spoon them out using a slotted spoon. Leave them on layers of kitchen tower for the excess oil to be absorbed.  


Sticky chicken wings

500g chicken wings
300g runny honey
50g light soy sauce
1 red chilli, finely chopped
1 clove of garlic, crushed

1. Preheat the oven to 180.

2. Heat the honey, soy sauce, red chilli and garlic until just started to boil.

3. Place the chicken wings in a baking tray and drizzle the honey mixture all over.

4. Place the chicken wings into the oven. Cook for 20 minuets and turn them over. Cook for another 10 minutes or until cooked through.