Showing posts with label British Cuisine. Show all posts

Saturday, 11 February 2017

Gressingham duck legs marinated in homemade plum sauce

I haven't had the luxury of time to forage for berries in the wild last year, also the community orchard nearby has been stripped bare by some greedy leeches in the early seasons, so no apples or plums either. Indeed this is very disappointing as my pantry collection requires urgent replenishing!

I recently put my last bottle of plum sauce into use, and just realised I did not write a post on making plum sauce! I gathered over 6kg worth of plums last year and made A LOT of plum sauce. They taste even better after being left on the shelves for a year.

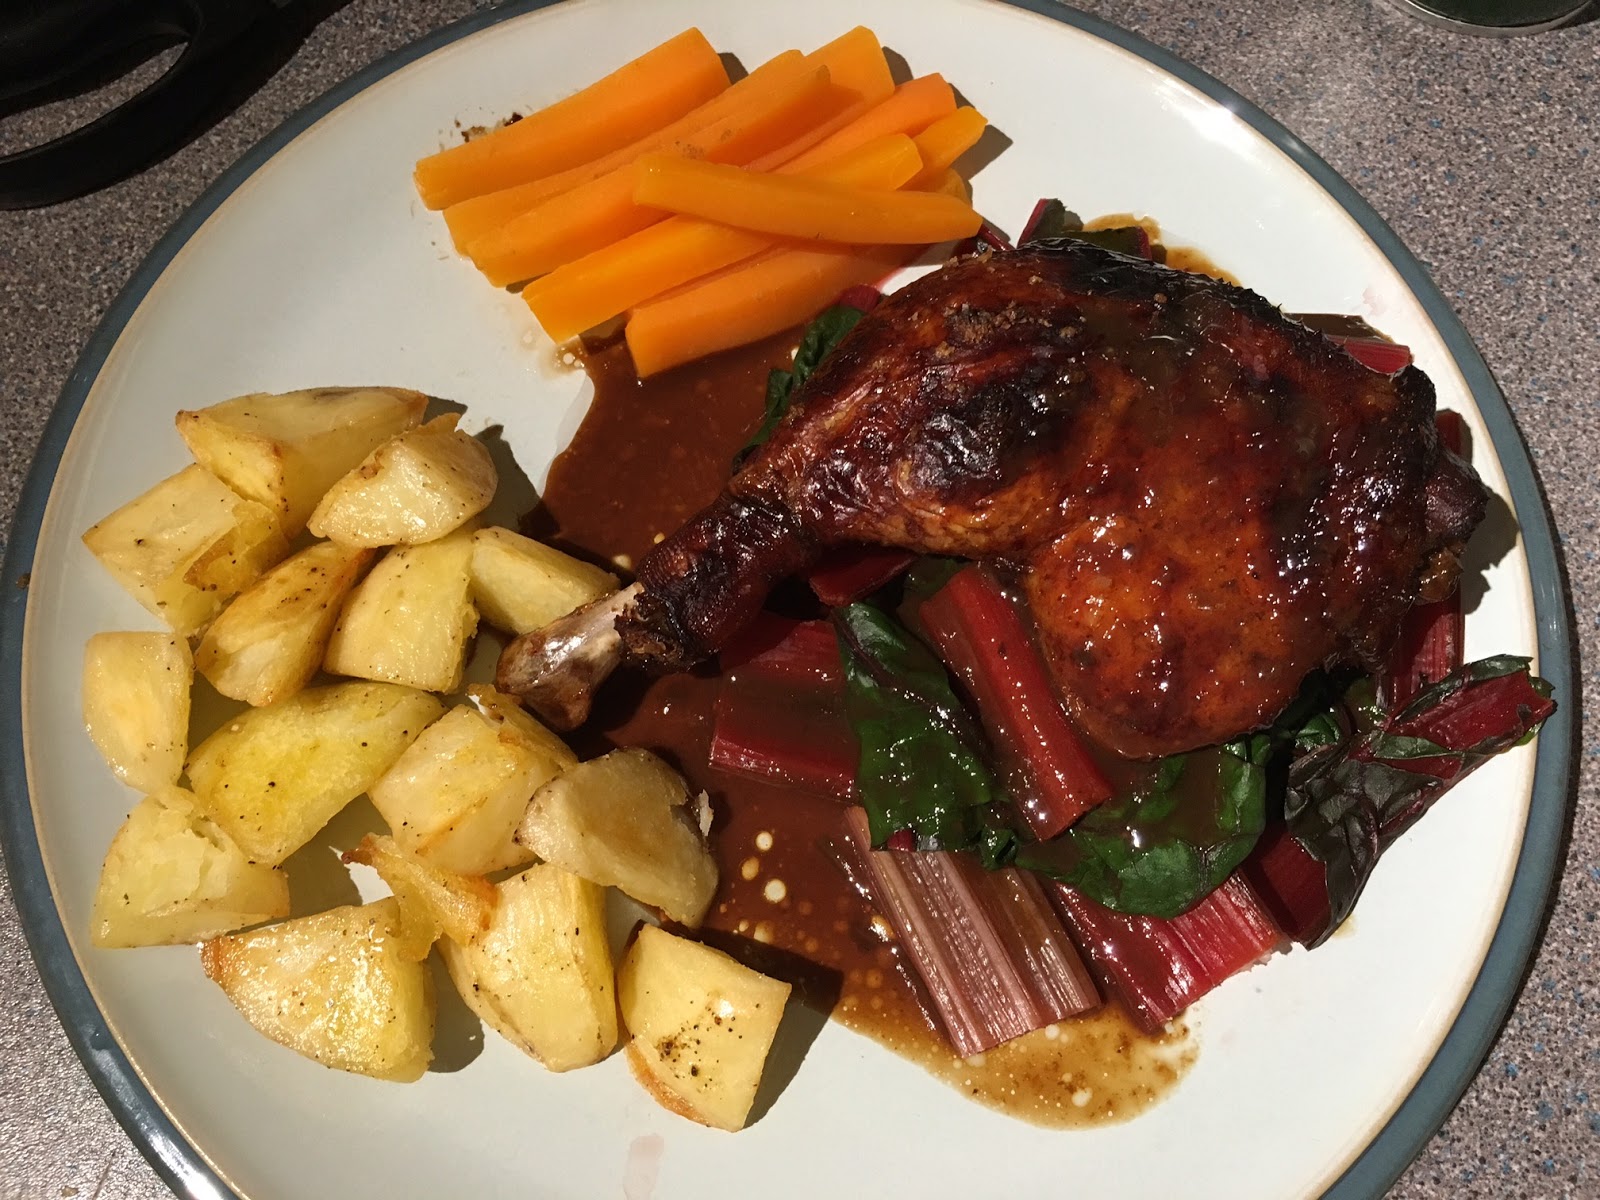
The end result is Gressingham duck legs marinated in plum sauce overnight, grilled and serving with steamed chard, carrots and roast diced potatoes. If I may say so the combination was gorgeous. The earthiness of the chard balanced the sweetness of the plum sauce, which also has a hint of sharpness! 


Serves 2

2 Gressingham duck legs (or duck breasts if preferred) 
2 maris piper potatoes, diced
1 bundle of red Swiss chard, separate the leafs and the stems
250ml of plum sauce 
Dollop of organic unsalted butter

1. Place the duck legs in a freezer bag and pour in the plum sauce then securely seal it. Make sure the legs are coated with plum sauce all over. Leave in the fridge overnight. 

2. The next day, peel and dice the potatoes, as well as peel and prepare the carrots. You may prefer leaving the skin on which is also fine.

3. Preheat the oven to 180°C. 

4. Place a frying pan over medium heat. When it is hot enough add a dollop of butter, wait for it to sizzle then place the duck legs on skin down and cook for 8 - 10 minutes until brown.

5. Transfer the duck legs into a baking tray and carefully pour in the plum sauce so it doesn't touch the skin. Sprinkle a generous amount of sea salt on top.

6. Put the diced potatoes into a separate baking tray, season with salt & pepper and a generous amount of oil. Massage them and place both the duck legs & potatoes into the oven, with the duck legs on the higher shelve. 

7. Cook in the oven for an hour or so. It is OK to have duck a little pink in the middle and that's how I have mine, so feel free to adjust the timing in accordance to your taste. 

8. Make sure the potatoes are periodically tossed and turned so they don't become stuck to the tray.

9. Around 20 minutes before the duck legs are ready, boil the kettle and place the carrots & stem of swiss chard into the steamer and steam for 15 minutes or until soften. Add in the swiss chard leaves and steam for further 5 minutes.

10. Plate up the duck legs, diced potatoes and vegetables. Before ordaining the dish with the plum sauce juice, you may wish to spoon out as much of the duck fat as possible.


Monday, 22 February 2016

Cream of mushroom soup (with crispy bacon)

Fungus is a fascinating ingredients. Depending on the variety, the texture is often vary. I would love to know more about fungus, or at least feel competent enough to forage these beauty in the woods. The only fungus foraging I have done is for Chicken Of the Wood. 


It is distinctively bright yellow and it was a well known local site. As the name suggests, this fungus has a texture of chicken meat and would make a fantastic substitute, only if it were commercially available. Simply pan fry it with a little oil, salt and pepper and that's all it was needed.

So that's a little insight into my love for fungus, back to this cream of mushroom soup recipe I originally wanted to share here. It is incredibly simple to make, and its great to take into the office for lunch or as a light supper. I sprinkled my with some crispy streaky bacon but they can be replaced with croutons if desired.  


Serves 4

900g chestnut mushroom, halves
1 tsp of thyme 
2 cloves of garlic, finely chopped
170ml single cream
1 potato, peeled and diced
1 litre of vegetable or free range chicken stock
1 tbsp of porcini paste
10g of dried porcini 
8 rashes of streaky bacon, diced

1. Preheat the oven to 150°C. On a baking tray, lined it with a sheet of baking paper, place the mushrooms on top and sprinkle the thyme and a drizzle some olive oil all over. 

2. Cook in the oven for 20 minutes. The mushrooms will shrink and release water. 

3. Take the mushroom out and sprinkle the finely chopped garlic. Cook in the oven for a further 10 minutes.

4. Meanwhile, cook the diced potato in the stock, dried porcini and porcini paste until very soft. 

5. In a frying pan, cook the bacon pieces until crispy.

6. Tip the mushrooms and the juices in with the potato and stock, bring it to boil.

7. Take the mixture off the heat and blend with a handheld blender. 

8. Mix in the single cream and sprinkle the bacon before serving.


Friday, 11 December 2015

Simply Nigella's Asian-flavoured Beef Short Ribs (with a twist)

I love watching most cookery programmes and there are a few chefs I idolised, with Nigella Lawson being one of them. I have been religiously following her latest series on BBC and there are lots of excellent new recipes I am interested in trying out.

So, with so many recipes to choose from, where do I start? I had a family gathering last week and what a great excuse to try out the Asian beef short ribs. So effortless and can be pre-cooked the night before! 

Waitrose sells some delicious Aberdeen Angus beef short ribs at £6.99 per kg which I was tempted in purchasing; in the end I opted for what the local butcher has to offer instead. They were some well-hung beef from Twyford and just the look of them I know they will come out gorgeously delicious. This is a rack of ribs rather than short rib pieces. I've been reassured by the butcher that it cooks better this way. If you haven't got a big enough roasting tray/ pot then it cut up pieces will do just fine.


As the title of this post suggest, the recipe originates from the Simply Nigella series and I would not pretend otherwise. However, I did make some small adjustment to it. The key ingredient to the recipe is hoisin sauce. It is so easy to get all kinds of what used to be exotic ingredients in general supermarket nowadays it really does make life easier. The one I have gone for is the trusted Lee Kum Kee Hoisin Sauce. 'Hoisin' actually means 'seafood'. However, turn the jar around to the ingredients list you will see there is no sign of any sea creatures but mostly made up of fermented bean paste! I do love languages. 

Here is the finished masterpiece and my God it was divine! 


Serves 6 - 8

2.6kg beef ribs
1 jar of Lee Kum Kee Hoisin sauce
500ml water 
1 tbsp of light soy
1 tsp of dark soy
1 tsp of sesame oil
125ml of Shaoxing wine (or dry sherry as an alternative)
1 pinch of ground white pepper
1 tbsp of Chinese five spice
4 gloves of garlic, crushed
10 whole dried chillies, chopped
Some freshly ground Sichuan peppercorn 
1 bunch of fresh coriander, chopped
2 fresh red chilli, chopped (or use 1 tbsp of crushed dried chilli flakes) 

1. Preheat the oven to 150C/ gas mark 2. 

2. Place the ribs in a large, deep roasting tin.

3. Mix together all the above mentioned ingredients (apart from coriander & fresh red chilli) and pour over the ribs.  


4. Cover the roasting tin with foil, ensure the edges are securely sealed and place in the oven for 4 hours.

5. Once cooked, take the roasting tin out and leave on the side to cool. 

6. Transfer into a large tupperware or any type of container then leave in the fridge overnight. This is so the flavour can enhance and the fat solidify to the top.

7.  Before reheating the meat, remove the harden fat at the top and transfer the content into a ceramic ovenproof dish and cove with foil (I used the largest Le Creuset stoneware dish here).

8. Preheat the oven to 200C/ mark 6 and cook for 1 hour.

9. Scatter the chopped coriander & chilli on top before serving.

For the dinner, I served the meat with steamed rice and spinach. Much to my surprise here were leftover for lunch the next day. The sauce was so intensely rich I cannot resist to make a noodle soup dish out of this. The next morning I reheated the meat in the oven and boil some udon in just boiling water. When the meat and udon are ready, I dish up the udon with piece of meat sitting on top. I then anoint the dish with 2 tablespoon of the meat juice follow by the udon water. Boy oh boy it surely made a tasty noodle soup broth, and a lighter way of serving this beautiful dish too.

Sunday, 1 November 2015

Wild Mallard Breast Fillets with Spanish Croquettes

The clock has gone back over the weekend and autumn has officially creeped in. There is definitely a chill in the air, and it is already dark when we step foot out of the office. Autumn is my favourite season. The countryside turns golden and the crips, chill air is rather refreshing to the lungs. 

Despite all that, there is a lot of positives for autumn and winter. It is time to blow the cobweb off one's cast iron casserole dish, and look out for a variety of game available soon.

Duck is the most common game and is widely available all year round. It is my prefer game bird as it has a less intense flavour than the others. I came across these wild mallard breast fillets from Waitrose and they look divine.


I decided to keep my dinner simple and cooked the millard fillets the simplest way.


Serves 2

1 packet of wild mallard breast fillets (or normal duck breasts if they are not available).
1 red pepper, sliced
300g baby spinach, steamed
150g Sol & Mar Caprichos ibericos (from Lidl)

1. Cook the caprichos ibericos as per instructions on the packet.

2. Melt a knob of butter i a frying pan and sealed the mallard breast fillets until brown. 

3. Preheat the grill to 180 degree and place the fillets skin side up for approximately 10 minutes depending on how you like them. I prefer mine medium rare.

4. In the same frying pan, stir fry the sliced pepper until cooked through.

5. Steam the spinach on a steamer until they are wilted.

Serve! 

Tuesday, 27 October 2015

Homemade Rosehip Syrup & Rosehip Facial Oil

Have you ever notice these vibrantly red, fruit of the wild rose bushes? They are plentiful in the English countryside and it is a super wild food for immune systems as well as for youthful skin! Rosehip is a great source of vitamin C, 20 times the amount of vitamin C in oranges. To keep the nation health, during the austerity of the WWII, the British government encouraged the public to gather rosehips. They were then collected and processed into rosehip syrup by the Ministry of Food and were sold to the public at a discounted price in Welfare Clinics.

Rosehip syrup has an unique and delicate flavour. It can be enjoyed as a cordial, spooned over pudding or ice cream.

Today our high street is full of various vitamin supplements and those who uses rosehip syrup as vitamin C supplement is rare. However, another form of rosehip product has become immensely popular in recent years - rosehip oil. Apparently it is the best kept secret of many celebrities to keep their skin youthful and hydrated. There is a huge selection of branded rosehip oil available on the high street. I am sure they are as pure as they claimed to be but surely nothing is better for the skin than products made by your own fair hands?

This autumn I've been busy harvesting rosehips in the country to make my own rosehip syrup to fight off the cold/ flu, and the best rosehip oil to keep my skin looking youthful. They are a bit of a bugger to gather as we all know, rose bush is very thorny so considered you are warned!


Rosehip Syrup

Make approximately 1L

1kg rosehips
250g white granulated sugar

1. Clean the rosehip under cold tap water.

2. Bring 1.5L water to the boil in a preserving pan.

3. Mince the rosehips in a food chopper and transfer into the boiling water.


4. Bring to boil and allow to stand for 15 minutes before pouring the mixture through a muslin cloth, and allow it to drip until most of the liquid has come through. Reserve the pulp.

5. In the cleaned preserving pan, bring 750ml fresh cold water to the boil. Stir in the reserved pulp and repeat step 4 but discard the pulp in the end.

6. Combine the 2 solutions to the cleaned preserving pan and boil to reduce the liquid at around 1 litre.

7. Add the sugar and boil for a further 5 minute so it dissolve well.

8. Bottle the liquid into hot sterilised bottles and seal.


Rosehip Facial Oil

Make approximately 200ml

400g rosehips
250ml organic jojoba oil*
5ml pure vitamin E oil**
5ml Frankincense essential oil**
7 x amber pipette bottle
1 Milton tablet
1L water

* I have chosen to use jojoba oil as the base oil here as I feel it would suit my skin type the best. Jojoba has excellent moisturising properties and can be easily absorbed without leaving the skin feeling greasy. Depending on your skin type, you may choose to use other odourless carrier oil, such as wheatgerm oil, apricot oil, almond oil etc

** To create a truly tailor-made serum, I've added a few drops of vitamin E & Frankincense essential oil into concoction. Vitamin E is a powerful source of antioxidant which helps to regenerate and nourish the skin; Frankincense helps to relieve anxiety and to prevent ageing of the skin. There are plenty of other essential oil widely available so choose the ones that suit your needs best. Always go for the best quality you can afford.

1. Clean the rosehips under cold tap water.

2. Ensure the hairy heads and stems are cut off.

3. Slightly crushed them in a mortar and pestle so the goodness can easily released into the oil.

4. Preheat to oven to its lowest heat available.

5. Put the rosehips into an oven proof jar (I used a Kilner jar here) and pour in the carrier oil of your choice.

6. Cover the jar and place in the middle of the oven for a few hours.

7. Take the jar out and let it cool down.


8. Once the oil has cooled down, pour the oil through a muslin cloth and allow it to drip until most of the oil has come through.


9. Meanwhile, dissolve a Milton tablet in a saucepan of water in accordance to the instructions on the packet.

10. Soak the amber pipette bottles in the Milton solution for a period of time (always check instructions on the packet).

11. To dry the bottles, place them on a baking tray lined with baking paper and leave in a low heat oven until they are completely dried of Milton solution.

12. Add in the vitamin E & Frankincense oil into the jojoba & rosehip solution.

13. Mix the oil gently. Whatever you do please DO NOT shake the oil as it could change the properties of the oil and cause it to go off much quicker.

14. Decant the oil into the amber pipette bottles and seal.

They should last for about a year. Keep them out of direct sunlight.

To avoid contamination, when applying the oil please take care so the dropper doesn't touch the skin.

Saturday, 5 September 2015

Sweet Potato Wedges

I have a love-hate relationship with sweet potato. My mother loves sweet potatoes and always praises its health benefit. When I was a child she would force sweet potatoes upon me whenever we have BBQ or in the cold weather, and I was (and still am) not somebody who likes being told what to do/ eat. My natural instinct was to go against it and it lasted well into adulthood. 

In recent months I was invited to a couple's house for dinner and sweet potato wedges was on the menu. And of course refusing what your host is offering would should a lack of decorum so it was a no no. There I was, consumed some sweet potatoes wedges in years and much to my delight, I rather enjoyed them. I genuinely thought they were much tastier than normal potato wedge. Perhaps my taste buds have matured with age, or without the motherly nagging has suddenly made this root vegetable more palatable. 


1. Preheat the oven to 200°C.

2. Cut the sweet potato in to wedges-shape.

3. Season with freshly milled black peppercorn and sea salt.

4. Splash some rapeseed oil all over and massage the wedges well so they are evenly coated with oil and seasoning.

5. Place them into the oven for approximately 25 - 35 minutes or until they are brown and soft. 

Monday, 31 August 2015

Homemade Blackberry Jam

And so the foraging walks continue.... This time we have been busy gathering blackberry. They are so abundant near where we live and I cannot understand why not more people are picking and making use of these beauty. They are FREE for all!! 150g of blackberry will easily costs £1.50 from the supermarkets. I suppose from my point of view there are more for me! 

I perception on jam making has always been 'a bit of a faff'. Reason being I saw all these variety of jam making kit available in Lakeland and I thought: 'Gosh, this is so much effort, and all the gear that is required!' Well, how wrong was I. Again, there many different types of ham and preserves recipes available, and I found one that requires minimal effort... excellent! It is so simple to make that I am addicted to gather more berries and produce more jam, which makes perfect Christmas gifts for friends and family. 

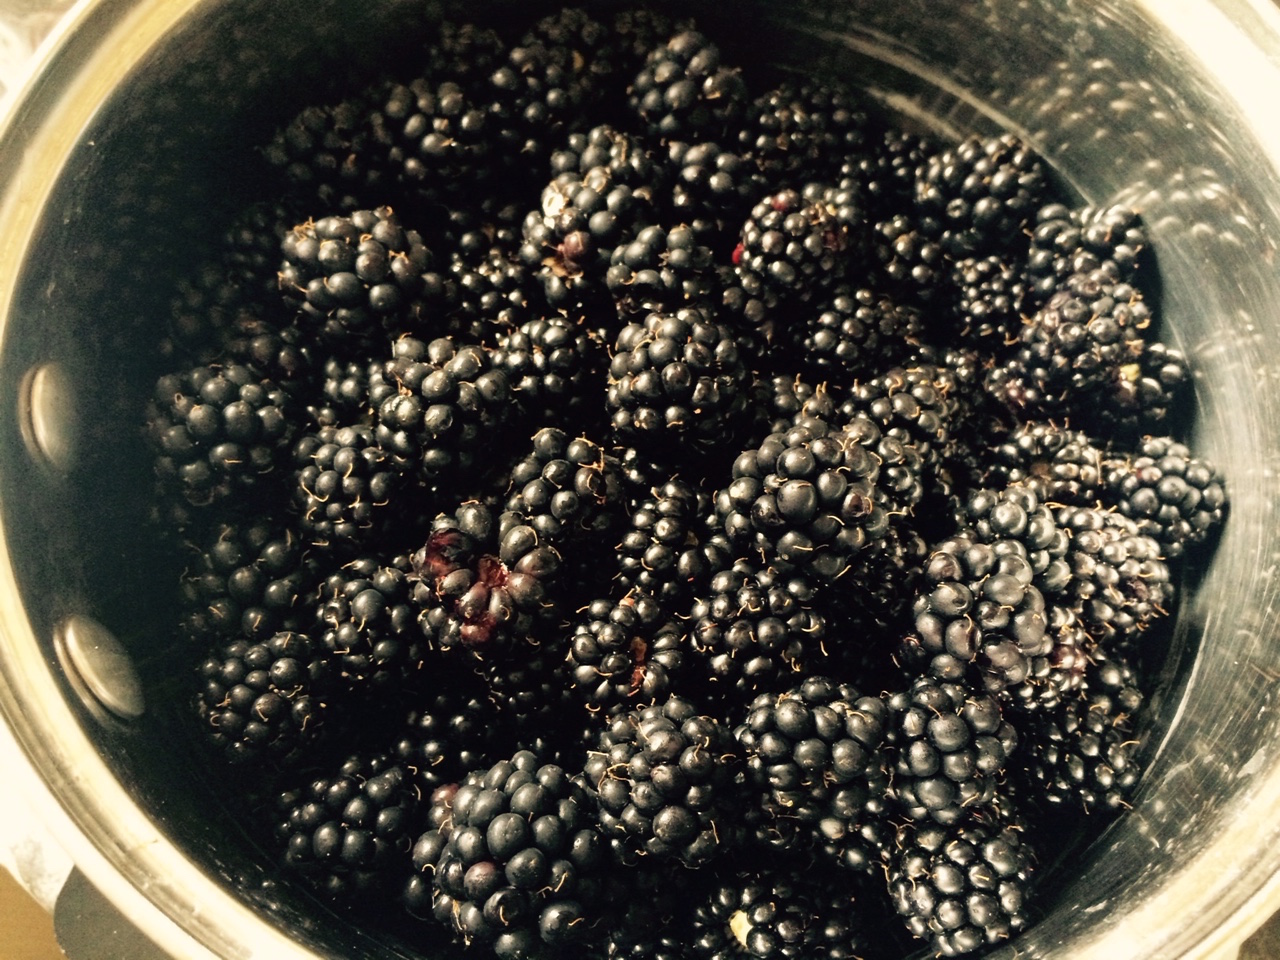
Aren't they gorgeous? They are very sweet and juicy as well.


600g blackberries
350g soft brown sugar

1. Put the blackberries into a large sieve and rinse under running water.

2. Tip blackberries into a large pan, cover it and cook on a low heat for 15 minutes.

3. Take it off the heat and use a potato masher to press the berries.


4. Warm the sugar in the oven in the lowest heating.

5. Heat the berry puree to boiling point, remove from the heat and add the warm sugar. Stir over low heat until sugar is completely dissolved.

6. Bring the mixture to the boil and boil rapidly until it begins to thicken. I find this takes approximately 40 minute depending on personal preference.

7. Meanwhile, prepare the jam pots. On how to sterilise jam pots please lick here.

8. While the jam is hot, fill the pots to the brim and cover with the crew cap/ lid.

9. Label the pots if desire. Store in a cool and dark cupboard.

Wednesday, 26 August 2015

Homemade Elderberry Cordial

We are now into late summer, the wild berries are in full bloom, especially after a bit of rain and sunshine. The countryside is beaming with blackberries, crab apples, elderberries etc 

My friend and I went on a foraging walk and gathered some elderberries that looks exquisitely like semi precious germ stone. We were too busy picking that I forgot to take a picture of these beauty. For those who are unsure what elderberry looks like, here is a picture I found on Google Images:


There are so many different elderberry cordial recipes widely available and it really is so simple and fun to make. Do be careful and not wear any nice or light colour clothing as the berries do stained.

I didn't really measure how much cordial I have produced, but you get the idea:


It is very important to sterilise the bottles or jam pots properly, otherwise the content will be spoiled within days. I always keep all the interesting glass bottles or jam pots for the pantry or for making homemade goodies as such. Sterilising is simple to do and here is how:

1. Wash the bottles/ jam pots and caps under hot soapy water. Drip dry them on draining board.

2. Preheat the oven at the lowest heat.

3. Place the bottles/ jam pots and the caps on a baking tray and place into the oven until all liquid evaporated. They can be left in the oven until you are ready to bottle/ pot the content.


750g granulated sugar
700g elderberries 
800ml water

1. Get the elderberries off into a large sieve by using a fork. Rinse under running water to get rid of any bugs etc.

2. Boil 800ml water in the kettle and pour into a large mixing bowl. Preferably not stainless steal, as I find this will give the liquid a metallic taste.

3. Mix in the sugar and stir to dissolve. 

4. Add the elderberries and stir occasionally. Leave for at least 24 hours. 


5. To enhance the flavour and colour, press the berries against the bowl using a spatula to release the juices. 

6. Sieve through a muslin cloth. Alternatively I find a pair of brand new stockings does the trick just as well. 


7. Pour into cleaned and sterilised glass bottles. Seal with caps straightaway.

Sunday, 9 August 2015

Pork Shoulder Roast with Crackling

A colleague of mine recommended a quality butcher to me which sets within a garden centre, what an unusual choice of premises. I was ambivalent about its selection and quality. Much to my surprise, the butcher counter has a huge selection of cuts of meat along with other food products. It even has a carcass hanging in the back of the shop front which you can easily specific your choice of cut.  

This Bevan's Butchers has a butcher counter within the Longacrse Garden Centre in Bagshot really is worth a visit. It offers more than meat, but also pies, cooked meat, cured meat, cheese, fish and more. Moreover, the staffs are so polite and knowledgable, the service is absolutely superb. Obviously the reason for my visit is for the quality meat, and the price is higher than average so this is a treat.

I bought a small piece of pork shoulder joint for a 2-person roast dinner.


Serves 2

500g pork shoulder joint
2 carrots, peeled and quartered
1 bunch of fine beans
2 potatoes, peeled and quartered

For your perfect roast potatoes, please click here.
  1. Preheat the oven to 220°C.
  2. Season the joint with a good amount of freshly milled sea salt & peppercorn.
  3. Place the joint into a roast tin skin side up and ensure the skin is dry. Scored the skin with a sharp knife.
  4. Rub more sea salt over the skin and into the creases. 
  5. Place the meat into the oven and cook for 30 minutes before turning the heat down to 180°C.
  6. In a separate roast tin, put the quartered potatoes and carrots int and drizzle some rapeseed oil all over. 
  7. Season with freshly milled sea salt & peppercorn and place into the oven. Cook for further 60 minutes together with the meat.
  8. Take the meat out and run a knife through the middle. If the juice is clear then set it aside to rest whilst steaming the fine beans; if the juice is bloody, return the joint into the oven for a further 10 minutes or until cooked through.
  9. Bring a pan of water to the boil and steam the fine beans. 
  10. Carve up the joint and serve up.

Thursday, 6 August 2015

British picnic: Scotch Quail's Eggs, Sausage Rolls, Cheese Straws & Sticky Chicken Wings

According to the weather forecast we are expecting a hot and sunny weekend, with every chance for it to be the total opposite, of course! We Brits are prepared for all weather, such as having a blanket at the ready in August! 

As soon as the sky is a little brighter, you will see people having the limbs out to maximise the tanning session; BBQs are in full swings in the back gardens, or chilling in the park with a picnic. It all depends on the party size and personal preference, a typical picnic hamper usually consist of quiche, cocktail sausages, scotch eggs, meat pie, strawberries and cream, pate etc 

Some of these food items can be easily made at home to add a little luxury to this hamper. Here are a few recipes:


Cheese straws

Jus-Rol Ready to Use Puff Pastry
200g grated extra mature cheddar cheese (depending on how cheesy you like your straws)

1. Preheat the oven to 200°C.

2, Grate some cheese.

3. Lightly flour a clean kitchen surface and unroll the pastry.

4. Slice the puff pastry into strips and place them on a baking tin that is lined with a sheet of greaseproof paper.

5. Sprinkle the cheese over the pastry strips and place it in to the oven.

6. Bake until they are golden but not burned. 


Sausage rolls

400g good quality free range sausage meat
Jus-Rol Ready to Use Crust Pastry
1 read onion, finely chopped
1 tbsp of wholegrain mustard
1 free range egg, whisk

1. Preheat the oven to 200°C.

2. Cook the chopped onion in a frying pan with some butter until soft. Leave it to cool down.

3. In a  bowl, mix together the onion and the sausage meat.

4. Lightly flour a clean kitchen service and unroll the pastry.

5. Spread the wholegrain mustard evenly over the pastry.

6. Cut the pastry through the middle and pastry enough sausage meat in the middle of it. 

7. Fold the pastry together so one is on tope of the other. Repeat the same to the other half.

8. Cut the sausage rolls into bite size and place onto a baking tray lined with a sheet of greaseproof paper.

9. Brush over the whisked egg.

10. Place the tray in the oven and cook for 20 minute or until  golden but no burned.


Scotch quail's eggs

12 quail's egg
100g stale skinless white loaf
250g good quality free range sausage meat
1 free range hen's egg
3 tbsp plain flour
1 litre Sunflower oil

1. Fill a large pan with boiling water and cook for 1 minute then take them of the heat and cope them out of the water to cool.

2. Cut the stale bread into small chunks and together with a pinch of sea salt and freshly ground black pepper, blitz in a mini chopper until it turns into fine dust. Place into a bowl.

3. Whisk the hen's egg in a bowl.

4. Divide the sausage meat into 12 patties of equal size.

5. Lay out 3 bowl with the following ingredients in: flour, egg and breadcrumb.

6. Peeled the quail's eggs.

7. In a cling film, place the sausage meat on top and put an quail's egg on top. Use the cling film to roll the sausage meat around the egg.

8. Now roll the egg first into flour, then dip into the beaten egg and followed by rolling it in the breadcrumb. Repeat the steps for the remaining quail's eggs. 

9. Pour the oil into a deep saucepan and heat it until it reaches about 180°C.


10. Lower the scotch quail's eggs in using a slotted spoon and fry until golden brown. Don't put too many in at once to avoid overcrowding. 

11. It should take around 5 minutes for the sausage meat to cook through. If the egg is browning too quickly then lower the heat a little. 

12. Spoon them out using a slotted spoon. Leave them on layers of kitchen tower for the excess oil to be absorbed.  


Sticky chicken wings

500g chicken wings
300g runny honey
50g light soy sauce
1 red chilli, finely chopped
1 clove of garlic, crushed

1. Preheat the oven to 180.

2. Heat the honey, soy sauce, red chilli and garlic until just started to boil.

3. Place the chicken wings in a baking tray and drizzle the honey mixture all over.

4. Place the chicken wings into the oven. Cook for 20 minuets and turn them over. Cook for another 10 minutes or until cooked through.


Sunday, 2 August 2015

Roast leg of lamb, roast potatoes and root vegetables

The UK supermarkets offer modestly priced New Zealand lamb all year round. I remember years ago I read in an article where it says the cost of rearing sheep in New Zealand, slaughtering them then shipping them half way across the world to the UK, cost less than the sheep rearing in the UK.

Not trying to justify cooking up those sweet, innocent looking little lamb at all.
The new season of British spring lamb has arrived since May, which I personally feel the meat needs little seasoning. Just some crushed garlic, salt and and a little bit of herbs will do. 

Roast dinner is one of my favourite meal. It is so versatile that I can eat it all year around with different type of roast meat and trimmings according to the season. A classic roast dinner consist of your choice of roast meat; roast potatoes; vegetables and gravy. The steps below will guide you to make each of these components of a great roast dinner and believe me, it is worth the effort!


Serves 4

1.5kg shoulder of British lamb
2 coves of garlic
1 bunch of fresh basil leaves
2 tbsp of rapeseed oil
Pinch of sea salt
50g of pine nuts 
2 carrots
2 parsnips
3 potatoes
500ml of lamb stock
Small glass of white wine
4 tsp of gravy powder 

  1. Remove the lamb from the fridge before cooking. Best to leave it to come up to room temperature. 
  2. Preheat the oven to 200. Splash some rapeseed oil into a baking try and place in the oven.
  3. Put the garlic, basil leaves, rapeseed oil and pine nuts into a mini chopper and blitzed into a paste.
  4. Prepare the root vegetables by peeling and cutting them into manageable sizes but not too small. Otherwise they will disintegrate during roasting.
  5. Peeled the potatoes and quartered them. Boil the spuds for 20 minutes, stick a knife through to see if it is soft in the middle. 
  6. Take the spuds off the heat, drained well. 
  7. For well roasted and fluffy potatoes: put the spuds back into the saucepan, cover it with the lid (or use a plate if there isn't a lid). Give it a good shake! 
  8. Take the preheated baking tray out and place the boiled spuds carefully into the tray. Make sure the hot oil doesn't splash everywhere. 
  9. Place the potatoes into the oven. Check on them periodically and turn them over every 15 minutes or so.
  10. Back to the lamb. Place the lamb in a roasting tin. Score the meat with a knife and massage the basil paste all over the lamb and press the paste into the slashes. 
  11. Arrange the root vegetables into the same roasting tin as the lamb and place into the oven.
  12. The cooking time is dependent on its weight and your preference on rarity. I always prefer mine slightly pink in the middle.
  13. Roast the lamb for 30 minutes then turn the oven down to 180°C and roast for a further 30 minutes. 
  14. Remove the lamb from the oven and wrap it with foil. Allow it to rest whilst you're preparing all the trimmings. 
  15. If the root vegetables are looking well roasted and golden, take them out and wrap them in foil too. 
  16. Pour the lamb juice from the roasting tin into a saucepan. Put it over a medium heat. 
  17. Pour in the white wine, turn the heat up and bring the liquid to boil.
  18. Add in the gravy powder and gradually pour in the stock. Stir well. If it is too runny, thicken it with some cornflour and cold water mix. Season with salt and pepper if desire.
  19. Check on the potatoes to see if they are done. 
  20. Carve the meat. Dish up the potatoes and vegetables. 
Now sit back and enjoy the hard work!

Tuesday, 17 February 2015

Beef Shank Stew with Mustard Suet Dumplings

Beef stew is one of my favourite winter dish. Boeuf Bourguignon, Guinesse beef stew, Cantonese style braised beef etc. They are effortless to make and rather wholesome. I have cooked lamb shank and pork shank before, but it was not until last weekend I came across beef shank at the Waitrose meat section. I am sure it has always been available at a butcher, but it was the first time I see it available as pre-packed. My immediately thought was 'bone marrow + beef = tasty stew!'. It do love Waitrose's meat section. It offers an excellent variety of cuts of meat that is comparable with the butcher, which other supermarkets cannot compete with. 

Beef shank meat is actually the shin. It has to be slow cooked to perfection. Once the meat is cooked through and falls off the bone, I then cut them into pieces. 


Serves 3

2 carrots, peeled and chopped into thick pieces
2 stalks of celery, cut to 3 pieces
6 shallots, peeled
2 bay leaves 
1 tbsp of tomato puree
500ml beef stock
700g beef shank
1 tbsp of wholegrain mustard
70g suet
125g self-raising flour
1 tbsp of wholegrain mustard
2 tbsp of plain flour
Salt & pepper
Some warm water

1. Season the plain flour with salt and pepper. Rub the meat with the mixture. 

2. Preheat the oven to gas 2.

3. Heat a dollop of oil in the cast-iron casserole dish. Once the oil is hot enough, seal the meat all around.

4. Leave the meat aside to rest. In the same casserole dish, cook the shallots, stalks, carrots and bay leaves until they soften. 

5. Put the meat back into the casserole dish, pour in the stock and tomato puree. Bring it to boil then lower the heat and let it simmer for 10 minutes.

6. Place the casserole dish into the oven and leave it to cook for 2 1/2 hour. Check the liquid level periodically and add more stock if necessary. 

7. Meanwhile, place the plain flour, suet and wholegrain mustard in a mixing bowl. Season with salt and pepper. 

8. Make a dwell in the middle and pour in some warm water. Careful not to put too much. If the mixture is too dry, more warm water can be added later.

9. Bine the suet and flour mixture together to form a soft dough. It is ready when the dough doesn't stick to the hands. 

10. Roll the dough into 8 small balls (or bigger ones, depending on preference).

11. Take the casserole dish out of the oven. Turn the heat up to gas 6. Cut the meat into small pieces and put back into the dish. Remove the bone marrow. 

12. Place the dumplings into the casserole, return it to the oven and cook for another 25 minutes. 

Sunday, 15 February 2015

Chorizo, Lentils & Potato Hotpot

Following on with the chorizo theme, this is another great winter one-pot recipe. So warming and comforting in those dark, winter nights. Chorizo could be replaced by pancetta if you so wish. 


Serves 2

150g chorizo, sliced
1 onion, finely chopped
2 clove of garlic, crushed
1 stick of celery, finely chopped
250g puy lentils
2 bay leaves
1 small bunch of thymes
1tsp paprika 
1L chicken stock
1 red chilli, finely chopped
250g baby leaf spinach
1 potato, diced

1. Panfry the chorizo slices until the aroma releases and fills the kitchen. 

2. Set the chorizo aside. In the same saucepan, sauté the garlic, onion, chilli and celery for 10 minutes or until soften.

3. Add in the lentils, bay leaves, thymes, paprika and potatoes. Mix well and cook for 5 minutes. 

4. Gradually pour in the chicken stock. Bring to boil and bring the heat down to simmer for 30 minutes or until the lentils and potatoes are cooked through. Check occasionally, sir and add more stock if necessary.

5. Add in the chorizo and spinach and cook until spinach starts to wilt. 

6. Season with freshly milled salt and pepper.

Wednesday, 15 October 2014

Crispy Pork Belly with Roasted Cherry Tomatoes on Vine

CRUNCH! CRUNCH! CRUNCH! Oh how I love that crunchiness of pork cracklings, its so tasty and full of aroma. It may not be the healthiest option but I am sure having a treat now and then cannot hurt do the cholesterol level too much damage... Balancing it with some health vegetables seems to be all justified in the end! 


Serves 2

2 slices of free range pork belly, scored the skin
4 vines of cherry tomatoes
2 carrots, peeled and sliced
2 potatoes, peeled and diced
1/2 tsp of Chinese 5 spice
1/4 tsp of dried thyme
Salt & pepper to taste 

1. Preheat one oven to 220 degree and another to 180 degree. 
N.B. If you only have one oven, you may wish to cook the diced potatoes half way through then turn the heat up to 220 degree for crisping the crackling.

2. In a baking tray, season the diced potatoes with salt and pepper, dried thyme and a splash of rapeseed oil. Place it in to the lower heat oven and cook for 40 minutes or until golden.

3. Place the cherry tomatoes in a roasting tin, sprinkle a dollop of oil and salt, cover with foil and put into the lower heat oven. Cook for 40 minutes or so.

4. For the pork belly pieces, massage the Chinese 5 spice, a pinch of salt an a dollop of oil into the flesh. Pat dry the skin and score. 

5. Place belly pieces in a baking tray, sprinkle a generous pinch of salt all over. 

6. Cook the belly in the higher heat oven for 10 - 15 minutes or until the skin starts to crackle. 

7. Turn the heat down to 180 degree and cook the belly for a further 15 minutes or until the belly is throughly cooked. 

8. Meanwhile, steam the sliced carrots until cooked but not mushy. 

9. Serve! 


Tuesday, 21 January 2014

Classic Cauliflower Cheese (with streaky bacon!)

Another classic British dish. Inexpensive and comforting, fantastic for the cold winter nights, especially fitting for January, as most of us would be counting the pennies until next payday! For those who are trying to cut own on meat consumption, feel free to take out the bacon. Personally I like a some streak bacon in it to give it an extra texture and enhance the flavor. 


Serves 4

1 large cauliflower, cut into pieces
1 liter milk (I used semi-skimmed)
150g extra mature cheddar, grated
60g plain flour
60g butter
6 rashes of streaky bacon, diced (I used Blythburgh free range ones)
1 bay leaf
Pinch of nutmeg
Handful of fresh parsley, chopped

1. Place a large saucepan on a medium heat. Cook the cauliflower pieces with the milk & bay leaf until they are soften (approximately 15 minutes) but not mushy.

2. Drain the cauliflower to cool and reserve the milk for the cheese sauce. Reserve some to sprinkle at the top.

3. Melt the butter in a saucepan and add in the flour. Whisk the mixture and slowly pour in the reserved milk.
4. Add the grated cheese into the milky sauce and a sprinkle of nutmeg. Leave to simmer for 20 minutes to thicken the sauce. Note: Be sure to stir it now and then so it does not burn at the bottom.
5. Preheat the oven to 220C. Put the cauliflower pieces into a deep baking dish
6. Meanwhile, in a frying pan, cook the streaky bacon pieces until golden and crispy.
7. Mix the cooked bacon into the sauce, pour it over the cauliflower cheese, sprinkle the remaining cheese and chopped parsley on top.

8. Cook it in the oven for 20 minutes or until golden.

Ta-dah!

Sunday, 12 January 2014

Sirloin Steak with Marsala Wine Peppercorn Sauce

Most meat eaters would enjoy  a nice, good quality steak as a treat every now and then. It is especially delectable when serves with oven chips or mashed, and garnish it with just the right quantity of blue cheese or peppercorn sauce (why spoil a delicious cut of meat by letting it swim in the sauce?). The thought of it is enough to make me drool! 

Personally I favor sirloin and rib eye over fillet or rump. Majority of us avoid animal fat like a plague because it was drummed into us that it is bad for our health, but when it is consumed in moderation, it is not as bad for you as hydrogenated fats (yes, real butter is better than vegetable spread!). Moreover, a little bit of fat really helps to enhance the overall flavor and the texture. 

As steak means to be a treat, why would you deprive yourself with supermarket prepacked steaks that have been sweating in plastic wrappings for days? Pay a visit to your local butcher. You will be surprised by the price, as it is often no more expensive (or cheaper) than supermarket, but the quality always outshine the former. Most importantly, you have a choice over its thickness in accordance to the individual appetite. 

I bought 2 slices of locally sourced sirloin from my local butcher (approximately 250g in weight) and it costs only just over £10. Very modest indeed.


Serves 2

A knob of butter
2 sirloin steaks (approximately 250g each, depending on appetite)
1 punnet of mushrooms, thinly sliced
2 carrots, peeled, halved then quartered
3 potatoes, peeled, chopped, boiled and mashed

Marsala Peppercorn Sauce:

50g butter
1 banana shallot, finely chopped
1 tbsp whole peppercorns, roughly crushed in a mortar and pestle
200ml Marsala wine
50ml double cream

1. Peeled the potatoes, chopped into chunks and boil them with lightly salted water until they are soft enough to mash. Keep warm.

2. Meanwhile, melt the butter in a frying pan or small saucepan but make sure it is not burnt.

3. Cook the banana shallot until soften.

4. Add in the crushed peppercorns, cook for another 10 minutes.

5. Turn up the heat and pour in the Marsala wine. Season with salt & pepper then leave it to cook and simmer under low heat. If the liquid is running low then top it up with more Marsala wine.

6. Steam the prepared carrots and keep warm.

7. Now for the steaks. Place a griddle pan on a high heat. When it is hot enough (not smoking), place the steaks on it.

8. The steaks were about 1 cm thick and for medium rare, cook each side for 2 minutes.  Note: Be sure to use a timer, guesswork does not work well with steaks!

9. Add a small knob of butter into the griddle pan and spoon the juice over the steaks.

10. Place the steaks on a plate, cover them with a foil and let them sweat whilst the mushrooms are being cooked.

11. Fry the mushrooms in the same griddle pan until they are cooked.

12. Now, let's finish the sauce. Stir in the cream and bring it close to near boil.

13. If there are any meat juice from the sweating-steaks, mix them in with the peppercorn sauce to enhance the flavor.

14. Well, everything should be ready to serve now! Enjoy.

Tuesday, 7 January 2014

Norfolk Mussels with Oven-roasted Diced Potatoes

Norfolk mussels are in season at the moment and are usually plentiful, available at most local fish mongers but not usually at the supermarkets, as they tend to stock up Scottish ones all-year-round. Absolutely nothing wrong with that but if something is in season and is local then I would much prefer supporting local produce and suppliers.
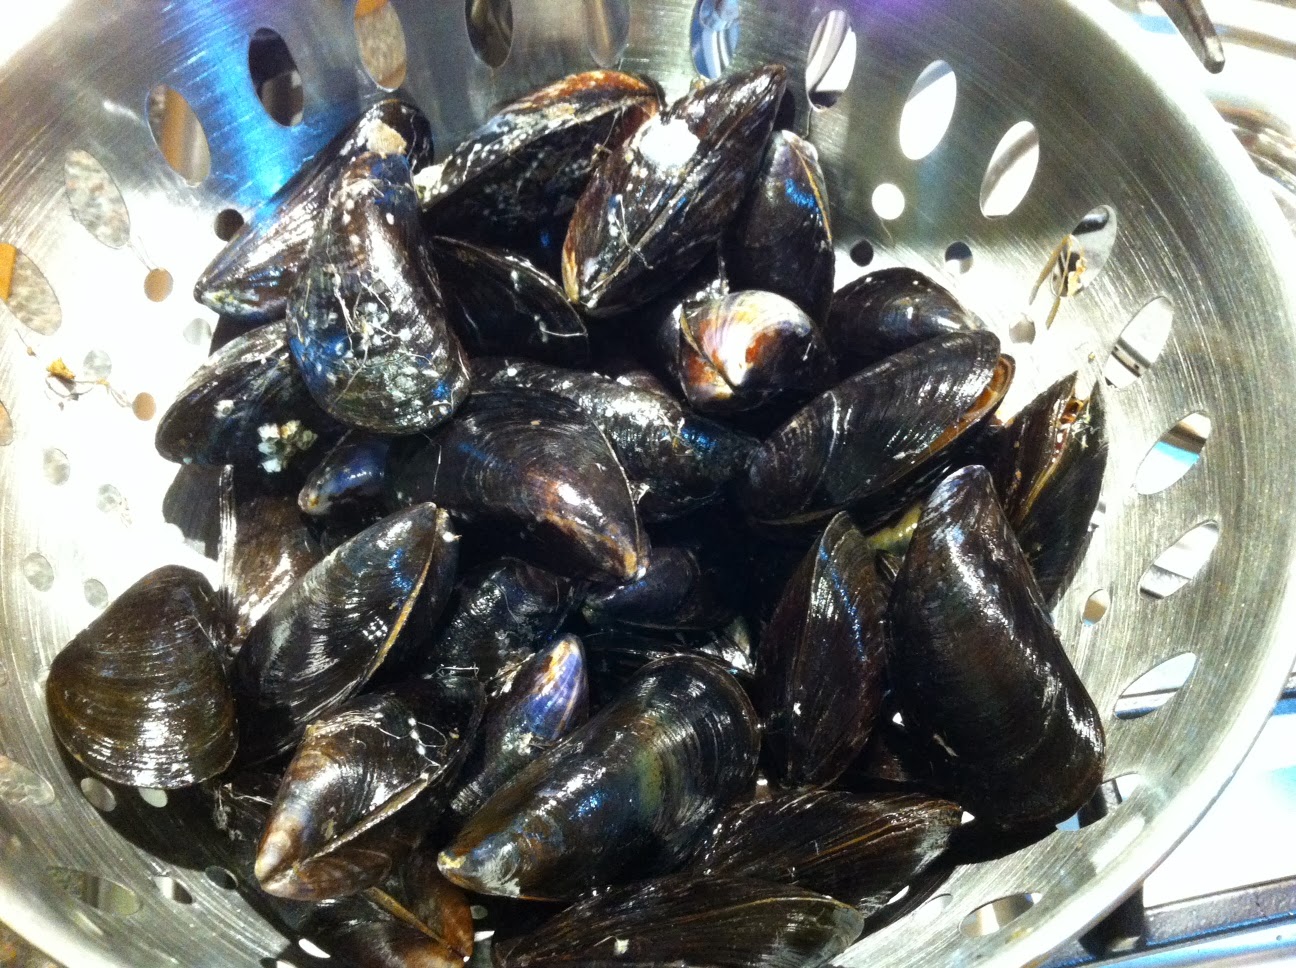
Seeing how fresh they are I felt I must get some for dinner. At £3.50 a kilo it really is fantastic. Some people are unsure of shellfish, because they are difficult to eat or fear that they will get food poisoning. OK it may not be your choice of main course if you were on a first date, but food poisoning is quite rare, unless they are contaminated. There are recipes that involve way too much flavour than needed, but I prefer to keep it simple to preserve its sweet taste.

Serves 2

1 kilo Norfolk mussels, rinsed and scrubbed
3 garlic cloves, crushed
A thumb of ginger, finely chopped
1 red chili, halved and deseeded
Dash of oil
100ml Japanese cooking wine

For the oven-roasted diced potatoes:

4 medium size potatoes, peeled and diced
Sprinkle of sea salt
Freshly ground black pepper
1 tsp dried rosemary
Dash of oil

1. Pre-heat the oven to 180 degree (fan oven).

2. Season the diced potatoes with salt, pepper and rosemary in a baking tray, and rub them with oil. They should take about 30 minutes in the oven or until they are golden.

3. Meanwhile, in a stockpot, heat a dash of oil, cook the ginger, garlic and red chili until their aroma is released but not burnt.

4.  Throw in the mussels, pour in the wine, put the lid on and bring it to simmer for 15 minutes or until mussels are open.

5. Serve with seasonal vegetables (keep it plain and simple) and perhaps a lice of farmhouse bread to mop up the juices!

Monday, 6 January 2014

Classic Shepherd's Pie

Some dishes taste better when it is traditional and proper, and Shepherd's Pie is definitely one of those. Like Cottage Pie, this quintessential English dish was introduced by the poor, using cheap cuts of meat, vegetables and a layer of mashed potato on top.

As it is called Shepherd's Pie, lamb is usually used in this pie and beef is usually used in Cottage Pie.


Serves 4

500g organic minced lamb
1 onion, finely chopped
1 tsp thyme 
2 garlic clove, crushed
1 carrot, finely chopped
1 stalk of celery, finely chopped
5 large Desiree or Maris Piper, peeled, chopped, boiled and mashed 
Butter (for mashing)
1/2 tube of tomato puree
1 tbsp Garam Masala 
Dash of Worcester Sauce 
300ml good quality lamb stock
Salt & pepper, to taste

Serve with: season vegetables

1. Heat some oil in the frying pan. Brown the onion, add in the garlic and thyme and cook until the aroma of the herbs is released but not burnt.

2. Add in the lamb and brown the meat.

3. Add in the rest of the vegetables and cook until they are soften.

4. Meanwhile, boil the peeled potatoes in salted water until they are soft enough to mash. Note: Don't forget to add in the butter and keep on tasting when mashing potatoes!

5. Back to the meat mixture. Time for a dash or two of Worcester sauce, tomato puree and Garam Masala. Note: Feel free to add more Garam Masala or tomato puree depending on personal taste.

6. Preheat the oven to 180 degree (fan oven).

7.   Pour in the stock, bring it to boil and let it simmer for 20 minutes or until majority of the liquid has evaporated. Add salt & pepper to taste.

8. Dish up the meat mixture in to an ovenproof pie dish that is deep enough but not too wide (or you will end up with a very thin pie). Top it up with the mashed potatoes. 

9. Put the pie in the oven and cook until the top is golden. It usually takes around 30 minutes.

10. Serves it with seasonal steamed vegetables and enjoy!